Why Every Beginner Creator Needs a Media Kit Template
Building a media kit for beginner creators doesn’t have to feel intimidating or confusing. Whether you’re pitching brands for the first time, responding to gifted collab offers, or trying to turn content into real income, a strong media kit helps you present your value clearly and professionally. This guide breaks down exactly how to build a beginner-friendly media kit — plus includes a free Canva media kit template so you can get started right away without overthinking the design.
Ever had a brand ask for your media kit and you froze because you didn’t have one yet? This post is your quick-start guide — no overwhelm, no fluff, just what you need to look polished and prepared.
How to Build a Media Kit as a Beginner Creator (+ Free Canva Template)
Why Every Creator Needs a Media Kit
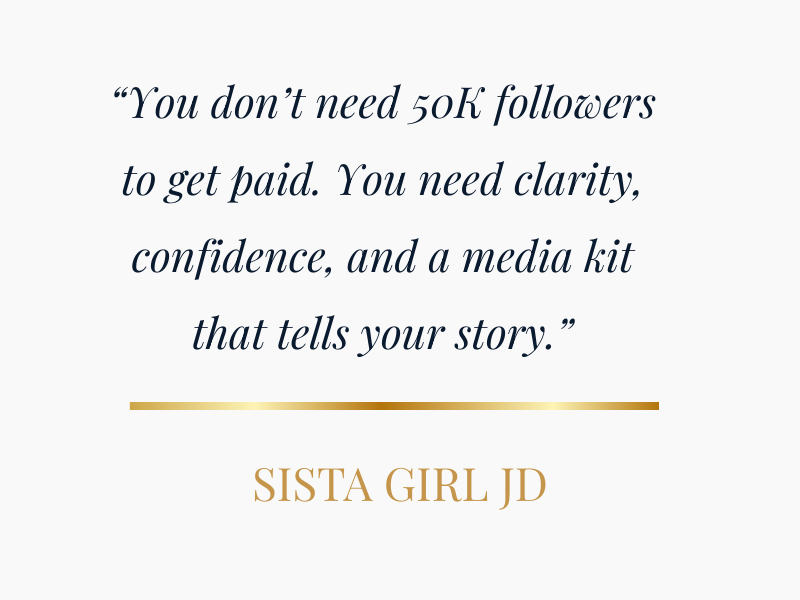
A media kit isn’t just for influencers with massive followings. It’s a credibility tool that shows brands you’re organized, professional, and ready to collaborate.
Whether you have 500 followers or 50,000, a media kit is your business card for brand collaborations. It’s the one-page snapshot that tells brands who you are, who you reach, and what services you offer.
Too many creators wait until they’re “big enough” to make one — but in reality, brands care about fit, not just follower count. That’s why even beginner creators should have a polished, professional kit ready to go.
To make this simple, I created a free Canva media kit template that you can edit instantly, even if you’re brand new. But first, let’s break down what goes inside a media kit and how to make yours stand out.

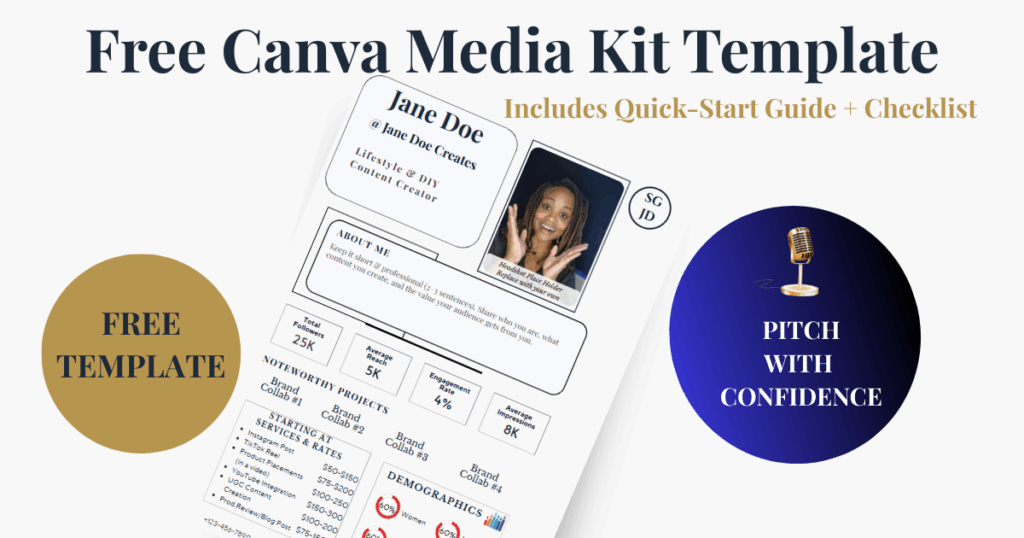
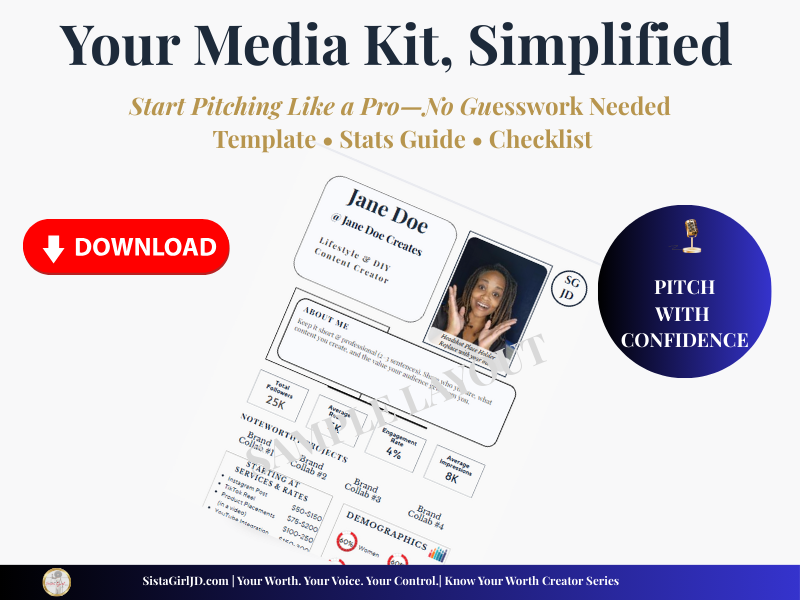
What’s Inside a Media Kit
If you’re wondering what to actually include, think of it as the highlights brands care about most. Keep it clean, simple, and skimmable. Your media kit doesn’t need to be complicated. At its core, it should include:
- About Me: A short intro (2–3 sentences) about who you are and what type of content you create.
- Audience & Engagement Stats: Follower count, average reach, engagement rate, and impressions.
- Noteworthy Projects: Brands you’ve worked with (or note that you’re open to collaborations).
- Services & Rates: What you offer and your starting price points.
- Demographics: Who your audience is — gender, age, location, and niche.
- Contact Info: Email, website, and social handles.

Pro Tip: Keep it clean, one page if possible, and use visuals (icons, graphics) so it’s easy to skim.
Breaking Down the Numbers
Metrics can feel overwhelming at first, but they’re just a way to show the real impact of your content. Once you understand them, they become your best evidence when negotiating with brands. One area that often intimidates new creators is metrics. Here’s what each one means, in plain English:
- Reach: The average number of people who actually see your content.
Example: If you have 25K followers, your reach might average around 5K.
- Engagement Rate: The percentage of your audience who interacts (likes, comments, shares, saves).
- Healthy ranges: 2–6%
Example: 1,000 engagements on 25K followers = 4%.
- Impressions: The total number of times your content is displayed (one person may count more than once).
Example: If 5K people see your post and 3K of them see it twice, you’ll have ~8K impressions.
Services & Rates Explained
This is where you spell out what you actually do. The goal isn’t to overwhelm brands with a menu of every possible service — just make it clear what you offer and where you shine. For beginners, I recommend keeping your service list short but clear.
Here’s a breakdown:
- Instagram Post ($50–$150): A single feed post showcasing a product or brand.
- TikTok Reel ($75–$200): A short-form video, great for trends and product storytelling.
- Product Placement in Video ($100–$250): Including a product naturally in your content (like a vlog).
- YouTube Integration ($150–$300): A mention or feature within a YouTube video.
- UGC Content Creation ($100+): Content you create for a brand to use on their own platforms or ads — no posting required on your page.
- Product Review/Blog Post ($75–$150): Written content, often paired with photos, that highlights a product.
Note: Some creators may also offer Try-On Hauls or Swatch Videos — if that fits your niche, you can always add it in. For beginners, though, UGC is a great starting service. Be sure to always frame your pricing as “starting at” so you have flexibility.
Setting Your Rates Without Fear
Pricing is often the hardest step for beginners, but it doesn’t have to be complicated. Think of it as giving brands a framework that respects your time, effort, and influence. Here are three simple rules to keep in mind:
- Start with a range, not a fixed number. Example: “Instagram Post: $50–$150.”
- Consider your niche. Beauty, fashion, fitness, and finance often command higher rates than general lifestyle.
- Factor in usage rights. If a brand wants to use your content in ads, that’s a separate fee.
Remember: It’s better to start with modest rates and raise them as you grow than to price yourself out too soon.
Grab Your Free Canva Media Kit Template
To make this even easier, I designed a free beginner-friendly media kit template in Canva that you can edit today. No design skills required — just plug in your info and you’re ready to pitch.
- It includes:
Editable “About Me” section - Pre-formatted stats boxes (reach, engagement, impressions)
- Services & rates section with starter ranges
- Audience demographics layout
How to use it:
- Click the link → Canva will open.
- Select Use Template (this makes your own copy).
- Replace the placeholders with your data.
- Save and export as PDF or PNG.
Media Kit FAQs for Beginner Creators
Frequently Asked Questions
A media kit for beginner creators is a simple, professional document that introduces you to brands. It typically includes your bio, content focus, audience demographics, engagement stats, services, and contact information. Even with a small following, a media kit helps brands quickly understand your value and how you can support their campaigns.
Yes. Beginner creators benefit from a media kit because it builds credibility and clarity. Brands often decide whether to work with you based on how clearly you present your audience, content style, and offerings — not just follower count. A media kit helps you look prepared, organized, and professional from day one.
A beginner media kit should include:
A short creator bio
Your niche or content focus
Platform statistics (followers, engagement, average views)
Services offered (UGC, reels, posts, reviews, etc.)
Optional rate ranges
Contact information
You don’t need everything perfectly polished — clarity matters more than perfection.
Yes. A Canva media kit template is absolutely professional when it’s clean, well-organized, and easy to read. Many creators — including experienced ones — use Canva because it’s flexible, visually polished, and easy to update as your stats grow.
You can use your media kit by:
Attaching it to brand outreach emails
Sending it in response to collaboration inquiries
Linking it in your bio or Linktree
Sharing it with agencies or PR teams
Think of your media kit as your creator resume — it supports your pitch without you having to over-explain yourself.
Final Thoughts
You don’t need to wait until you’ve hit a certain follower count to look professional. Having a media kit early shows you value your work and helps brands take you seriously. In fact, having one early sets you apart from other small creators.
Start with this free template, keep your stats updated, and as your audience grows, your media kit grows with you.
And if you’re ready to go deeper into pricing, pitching, and protecting yourself as a creator, check out my guides Know Your Worth and Small Creator, Big Value — your roadmap to turning content into real income.
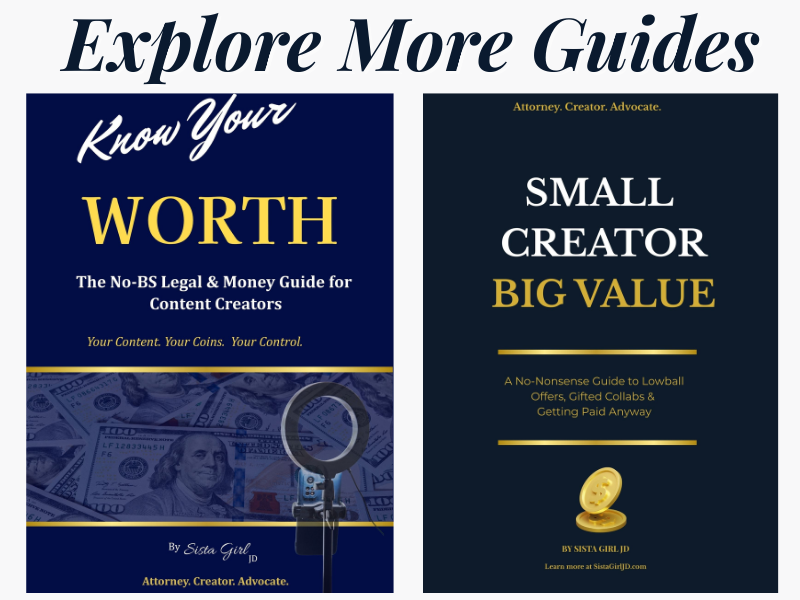
Both guides are available now on Amazon — designed to help creators pitch with confidence, protect their value, and turn content into income.
As an Amazon Associate, I may earn from qualifying purchases at no extra cost to you.

Sista Girl JD
About the Author
Sista Girl JD is an attorney, creator, and advocate dedicated to helping content creators protect their value, pitch with confidence, and turn content into real income. Through guides like Know Your Worth and Small Creator, Big Value, and practical resources like the free Canva Media Kit Template, she equips creators with the legal and business tools they need to succeed.
📌 Explore more at SistaGirlJD.com
or connect on YouTube at Sista Girl JD.